This week involved texturing the props we have made. I struggled with having a rust texture that I liked, and sampled many, placing them on my UV map and importing them into Maya. Some of the textures didn't look good in terms of the quality.
These four textures, while I liked them, weren't that great looking when they were placed onto the pipe model.
 |
| looks cool but hard to tile |
 |
| also cool, but once again, it wasn't very tileable |
 |
| another texture that didn't work out |
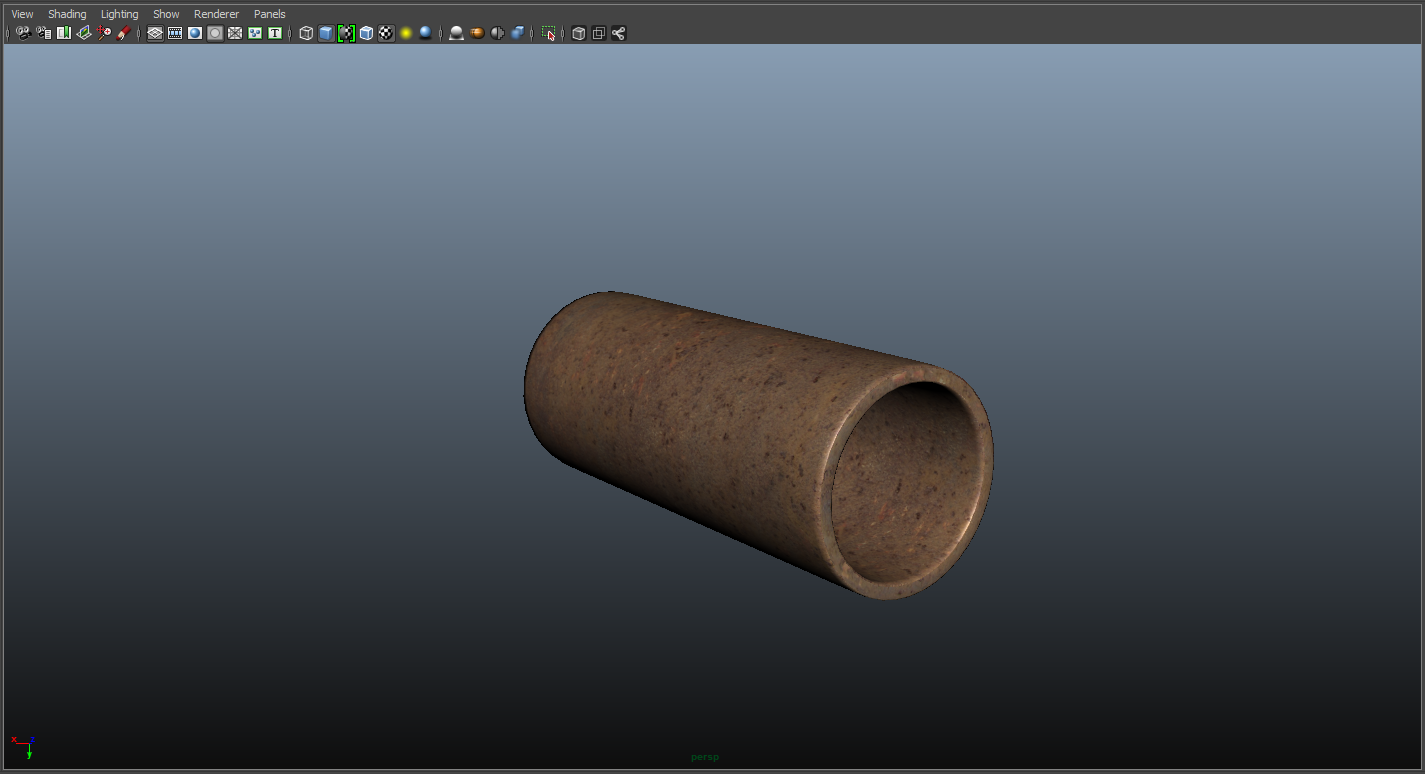
In the end, I finally found some textures that I liked, and tiled nicely! At first I believed that the quality was seriously bad, and it was hard to be convinced by the textures, when the prop itself was really smooth and flat on its surface.
I think we might do bump mapping? I hope we do, cause otherwise the rusted pipe will look a bit odd, especially since rust is definitely not smooth to the touch. I don't think we are though, so I will always be slightly irked with this pipe.
 |
| The UV for my pipe (I MADE IT LIKE 5 TIMES) |
For the texturing part, I originally mucked up my UV Texture, as I forgot about the small faces that I had made so that the pipe has sharper edges at the opening.
After redoing it, I had a nice UV, and I moved it into Photoshop to add the texture. However, my textures weren't well picked at first. I attempted to try and blend them so they were seamless, but it was too hard to try and do, and I didn't fancy wasting my time trying to make something look good when I could search for a better texture.
So I did.
It took me a while to find a texture that I felt was suitable, but I found it. This one did require some effort in making seamless, but it was much less time consuming than other textures I attempted.
I slapped in onto my pipe and BAM. One textured pipe.
 |
| Tiling the texture that I chose. |
 |
| A |
 |
| Successful texture no. 1 |
 |
| Successful pipe texture no. 2 |


No comments:
Post a Comment